
Field Analysis & Testing
Positive Material Identification (PMI)
PMI services are a part of dedicated Re-Generate Engineering Services
Positive Material Identification (PMI) is a specialized non destructive testing method which analyses metallic alloys to establish composition by reading the quantities by percentage of its constituent elements. PMI allows for verification of the exact composition of the materials used, ensuring the alloy used is as specified and that the grade is as expected. This is important for quality control and safety compliance, to ensure that resistance to heat and corrosion, durability and weldability meet specification.
PMI is a great option for:
-
Confirming alloy of materials prior to manufacture.
-
Testing of finished components.
-
Re-Certifying materials.
-
Evaluating materials that cannot be destroyed, or shipped to a laboratory.
As part of Re-Generate's on-site metallographic analysis, PMI is offered via handheld X-ray Fluorescence (XRF) and Laser Induced Breakdown Spectroscopy (LIBS) Devices.

Sciaps X-200 & Z-200 C+
Z-200 C+ Laser Induced Breakdown Spectroscopy (LIBS) Analyser
The Z-200 C+ is a dedicated analyser for alloy analysis including carbon content. It analyses carbon content in stainless, down to 0.007 ppm, for dependable separation of L and H grades. The C+ also analyses carbon steels, including carbon equivalents (CE) for weldability.
The Z-200 C+ (Z) measures carbon content in stainless and in steels, plus silicon and about 12 other elements including those critical for a variety of carbon equivalent (CE) calculations. The Z can be used for carbon, carbon equivalents, residuals in steel and stainless including L and H grade differentiation. The Z uses the technique laser induced breakdown spectroscopy (LIBS), which has many similarities to spark OES. LIBS has been an established laboratory technique for 20+ years. It fires a pulsed laser at the material to create a plasma, instead of a continuous electric spark like spark OES. Light from the plasma is measured with an on-board spectrometer to determine individual wavelengths and thus what elements are present. The replacement of the electric spark source is the key to making the technique handheld, and the laser produces a smaller burn mark and requires a much smaller volume for argon purge compared to spark OES.
The Laser Induced Breakdown Spectroscopy Process

X-200 High Speed X-Ray Fluorescence (XRF) Analyser
X-ray fluorescence (XRF) is a non-destructive analytical method used to determine elemental concentrations in various materials. XRF works by striking a sample with an x-ray beam from an x-ray tube, causing characteristic x-rays to fluoresce from each element in the sample. A detector measures the energy and intensity (number of x-rays per second at a specific energy) of each X-ray, which is transformed into an elemental concentration using either a non-standard technique such as fundamental parameters or user-generated calibration curves.
The X-200 XRF gun also measures a range of the same elements as the Z-200 C+, but critically can analyse for Phosphorous (P) and Sulfur (2), two elements that are critical in ascertaining the weldability of various steels.
X-200 XRF Display

Z-200 C+ Results

X-200 Results

Field Metallurgical Replication (FMR)
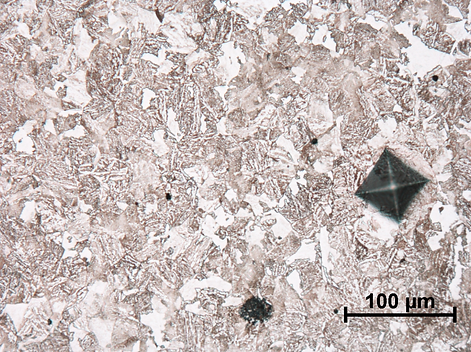
Field Metallurgical Replication (FMR) is a technique for non destructive inspection which is used for evaluating the microstructure of materials where taking samples to a laboratory for testing is not feasible or prohibitively expensive due to requirements for taking equipment out of service or repairing after cutting samples.
The metal surface to be evaluated is ground and polished to a mirror finish utilizing handheld polishing equipment. This reveals the microstructure, with the etched surface being replicated with a thin piece of acetate film. This film can then be examined via microscope in the field or back in the laboratory.
The examination process gives engineers the ability to example features of the microstructure such as grain size, cracks, carbides, and damage mechanisms such as creep. This is useful to confirm and further evaluate the observations made from other non destructive test methods (penetrant examination, ultrasonic flaw detection, etc).
Replication is a critical method for assessment of in-service equipment and aids in life assessment studies and fitness for service assessments. Outputs of information which can be obtained through the metallurgical replication process include:
-
Detection of high temperature degradation and other microstructural changes resulting from environmental exposure.
-
Identifying creep damage (presence and stage of progression) by observing common metallurgical features such as spherodization, microcracks and macrocracks, and formation of isolated and oriented cavities.
-
Analysis to identify the presence and type of heat treatments in fabricated materials and post-welded heat treatments in welded components.
-
Categorization and assessment of surface indications such as porosity, laminations, slag, cracks, seams.
View of original microstructure
(through a microscope)
View of replication's microstructure (through a microscope)


Hardness Testing
Material hardness is a characteristic defined as the ability to resist permanent deformation, either by scratching, indentation or other physical force. In engineering terms hardness is typically thought of as the ability to resist deformation from an indenter under a given compressive load. The application of hardness testing allows for evaluation of a material's properties such as ultimate tensile strength, ductility and wear resistance. This helps to inform whether a material or material treatment is suitable for the required purpose.
The hardness of a material can be measured by the size of an indent given by a specific load, or the amount of force required to indent a material. Re-Generate utilize portable hardness testing equipment to make on-site hardness measurements on large installations or equipment that would be impossible or impractical to ship to a laboratory. Yield and tensile strength of the material can be inferred from hardness test results from standards such as clause 7.1.3.7 of BS7910 and other appropriate standards.

Measuremax 50-520 Portable Digital Hardness Tester (Leeb Type)